
 English
 русский
 Français
 Español
 Indonesia
 Deutsch
 عربى
عربى 中文简体
中文简体

How Must an Autoclave Be Loaded? A Practical Decision Matrix for Every Load Type
Posted by Admin | 24 Jun
Content
- 1 Why Loading Matters: The Science of Steam Contact
- 2 The Universal Rules: Space, Orientation, and Weight Distribution
- 3 Loading by Item Type: A Decision Matrix
- 4 Gravity Displacement vs. Pre-Vacuum: Critical Loading Differences
- 5 5 Common Loading Mistakes and How to Fix Them
- 6 How to Verify Your Load is Correct (Indicators & Documentation)
- 7 Conclusion: Build a Repeatable Loading Protocol
A busy sterilization technician loads a final tray of wrapped instruments, closes the door, and initiates the cycle. Thirty minutes later, the load comes out wet, and a chemical indicator shows a fade—a signal that the cycle didn’t reach all surfaces. The culprit? Not the autoclave, but the way it was loaded. Proper loading isn’t a nice-to-have; it’s what turns a chamber of hot air into a verified sterilization process.
Why Loading Matters: The Science of Steam Contact
Steam sterilization works through latent heat transfer: saturated steam condenses on cooler instrument surfaces, releasing enough energy to denature proteins and kill spores. That heat delivery fails when steam can’t reach every square centimeter of the load. Cold air pockets—often created by tight stacks, pouches laid flat, or items pressed against chamber walls—insulate sections of the load and keep local temperatures below the lethal threshold. In surveys of hospital sterile processing departments, improper loading ranks among the top three causes of wet packs and positive biological indicators, and it contributes to roughly one in three cycle failures.
Even advanced autoclaves can’t compensate for a blocked steam path. A 2022 observational study from a large teaching hospital found that after retraining staff on loading techniques, wet pack rates dropped by 42% without any equipment change. The takeaway: loading is the process variable you control completely, and getting it right eliminates the most common causes of reprocessing waste and rescheduling.
The Universal Rules: Space, Orientation, and Weight Distribution
No matter which type of steam sterilizer you operate, three loading rules keep the load safe and the cycle predictable. They form the backbone of every standard operating procedure.
- Space: Every pack, tray, or pouch needs room for steam to flow around it. Maintain at least 2.5 cm (1 inch) between adjacent items and at least 5 cm (2 inches) from the chamber walls, ceiling, and floor. This prevents dead zones where condensate collects and blocks the next heat pulse.
- Orientation: Place items so that condensate can drain away rather than pool on a flat surface. Solid-bottom instrument trays should be tilted slightly or placed on a rack that keeps them off the shelf. Peel pouches must stand on edge with the paper side facing the same direction—never laid flat—so steam doesn’t have to fight through a plastic barrier.
- Weight Distribution: Always load from bottom to top, placing the heaviest, most rigid items on the lowest shelf. Wrapped textiles and delicate packs go on upper shelves. This prevents crushing and preserves the air pathways you’ve created below.
These rules sound simple, but skipping any one of them will create cold spots that chemical integrators will flag. The key is to treat every load as a deliberate arrangement, not a pile.
Loading by Item Type: A Decision Matrix
Different items demand different loading strategies because their shape, material, and packaging alter how steam moves and how condensate drains. Use the table below as a quick reference when building a mixed load.
| Item Type | Recommended Loading Pattern | Avoid | Key Reason |
|---|---|---|---|
| Instrument trays (solid bottom) | Place on rack upside down or tilted at a slight angle; separate trays with spacers. | Stacking trays flat on top of each other. | Prevents condensate pooling; steam must contact all surfaces from below. |
| Peel pouches | Stand pouches on edge in a dedicated rack; orient all paper sides the same direction. | Laying flat, stacking, or letting plastic faces touch. | Avoids steam-blocking by plastic laminate; paper-to-paper placement allows efficient penetration. |
| Wrapped instrument sets | Place packs on edge if possible, with the wrap fold facing downward; leave gaps equivalent to half the pack width. | Pressing packs against chamber walls or door. | Promotes steam circulation and allows condensate to wick away along the wrap. |
| Rigid containers | Remove silicone seal or open integral valve; place container with lid facing up, never stacked. | Closing the valve or stacking containers. | Steam must enter the container; a closed valve turns it into a sealed box that never reaches temperature. |
| Liquids (flasks, bottles) | Use vented closures; fill Erlenmeyer flasks to no more than 75% and beakers to 50%; place on lowest shelf near the drain. | Tightening caps, overfilling, or stacking containers. | Overfilled vessels boil over; sealed containers can explode. Lower shelf is the coolest zone, reducing violent boiling. |
| Textiles (gowns, drapes) | Load loosely, keeping fabric bundles no denser than 5 kg per 20 L of chamber volume; avoid compression. | Over-pressing or cramming into wire baskets. | Fabric swells during the cycle; tight loads trap air and require extended drying. |
| Waste bags | Open the bag or use a validated venting system; place bags in a secondary container on a dedicated shelf. | Sealing bags tightly or loading directly on the chamber floor. | Steam can’t penetrate a sealed plastic bag; direct floor contact blocks the drain and interferes with air removal. |
When assembling a mixed load, always prioritize the most challenging item—usually the largest liquid flask or the densest wrapped tray—and build the rest of the arrangement around those critical pieces.
Gravity Displacement vs. Pre-Vacuum: Critical Loading Differences
The way an autoclave removes air dictates how much density it can tolerate and how you should arrange items. Gravity displacement sterilizers rely on steam rising to push cold, heavier air down through a drain at the bottom. Pre-vacuum (pulse vacuum) machines actively evacuate air before steam enters, making them far more tolerant of denser, more complex loads—but they still reward careful spacing.
| Parameter | Gravity Displacement | Pre-Vacuum (Pulse Vacuum) |
|---|---|---|
| Air removal method | Passive displacement by steam buoyancy | Active vacuum pulses followed by steam injection |
| Maximum chamber fill (by volume) | 65–70%; exceeding this risks persistent cold pockets | 75–80%; vacuum cycles allow more compact placement but you still need visible steam paths |
| Wrap/pack size limits | 30 × 30 × 50 cm (12″ × 12″ × 20″); larger packs trap air that gravity can’t displace | Same maximum dimensions per pack, but denser items (e.g., multiple nested trays) can be run together if validated |
| Shelf loading style | Looser, with marked vertical gaps between tiers; never block the bottom drain port | Moderate density is acceptable, but keep a minimum 2.5 cm gap between packs and chamber walls |
| Wet load risk after drying | Higher if packs are too close; condensate can’t re-evaporate quickly | Lower, provided a vacuum drying phase follows and items aren’t touching cold chamber walls |
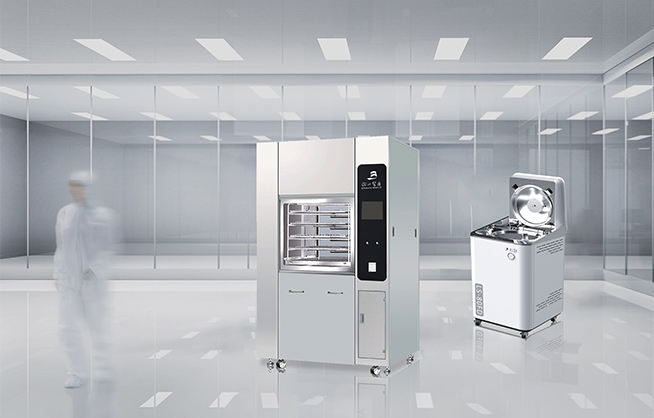
If you use a gravity unit, imagine steam moving like a gentle waterfall from the top of the chamber to the drain. Anything that blocks that vertical flow—like a flat tray placed directly on the shelf without a rack—creates a cold umbrella. Pre-vacuum systems are more forgiving because the pulsing action forces steam into tight spaces, but they still demand that all valve ports and container vents be open. Many modern pre-vacuum autoclaves, such as the JIBIMED WG series pulse vacuum sterilizers, include integrated load probes and dynamic air detection that will abort a cycle if resistance indicates a blocked air path, but that safeguard only works if operators have already given steam a fighting chance.
For table-top or vertical gravity models used in clinics and laboratories, following the baseline spacing rules is even more critical. A table-top steam sterilizer typically has a smaller chamber cross-section, so a single misplaced pouch can shield a large percentage of the load. Position the largest item first and then fill gaps with smaller pouches, making sure nothing leans against the door gasket.
5 Common Loading Mistakes and How to Fix Them
Most loading errors come from rushing or from applying one-size-fits-all logic to different item types. Below are the five mistakes sterile processing professionals see most often, along with an immediate correction.
- Stacking instrument trays without racks. Resting one solid-bottom tray directly on another blocks steam access to the tray above and traps water in the lower tray. Fix: Use a sterilizer rack that suspends each tray with at least 2.5 cm of open space underneath.
- Overfilling liquid containers and tightening caps. A 1-liter flask filled to the brim and screwed shut becomes a small bomb when heated. Fix: Fill flasks to no more than 75% of capacity, beakers to 50%, and leave caps loose or use a sterile venting plug.
- Laying peel pouches flat on a shelf. Plastic film becomes a steam shield when pressed against another pouch or the shelf surface. Fix: Stand pouches on edge in a wire rack with all paper sides facing the same direction, and never lay them flat even if there’s “room.”
- Forgetting to open the valve on a rigid container. A closed valve turns the container into a sealed insulator; the temperature inside may never reach 121°C. Fix: Incorporate a visual check of every container valve into your pre-load checklist, and consider containers that show open/closed status on the lid.
- Crowding the chamber wall and drain. Packs pressed against the cold metal wall experience condensate re-wetting and can’t shed moisture during drying. Fix: Use a loading ruler or a marked shelf liner to enforce a 5-cm margin from all walls and the drain port. If a bulky tray must go near the wall, angle it inward.
Each mistake alone is enough to cause a failed biological indicator. Together, they explain the vast majority of wet loads, prolonged drying cycles, and re-sterilization events that clog department workflows.
How to Verify Your Load is Correct (Indicators & Documentation)
A properly loaded autoclave still needs objective proof that the inside of the hardest-to-reach pack achieved sterilization conditions. Three types of indicators provide that evidence.
- Process indicators (Class 1): Tape or external marker strips show that the pack has been exposed to steam. Place one on the outside of every pack as a visual check—but these do not confirm sterility.
- Integrating indicators (Class 5/6): Placed inside a tray or pack at the point most resistant to steam—typically the center of a dense instrument set. Color change confirms that all three parameters (time, temperature, steam quality) were met simultaneously.
- Biological indicators: A test pack containing a known population of Geobacillus stearothermophilus spores should be run in the coldest location of the chamber, which is often the bottom front quadrant near the drain. For pre-vacuum cycles, a Bowie-Dick test performed on an empty chamber first thing each morning verifies that the vacuum system can remove air adequately—a direct reflection of how forgiving the chamber will be under load.
Document the result of every in-pack indicator and the biological indicator lot number, exposure temperature, and incubation outcome. When a load passes indicators consistently, the loading technique is validated. If you start seeing faint integrator color changes or one positive biological, recheck the loading rules before assuming an equipment malfunction.
Conclusion: Build a Repeatable Loading Protocol
The goal is to make correct loading a habit, not a memory exercise. Every sterile processing area should post a short, laminated loading checklist near the autoclave. Here is a model you can adapt into your own SOP:
- Inspect all items: clean, dry, and correctly wrapped.
- Confirm the chamber drain screen is clean and unobstructed.
- Load from the bottom shelf upward—heaviest, most rigid items first.
- Verify 2.5 cm between packs, 5 cm clearance from walls and drain.
- Stand pouches on edge, open container valves, loosen liquid caps.
- Place a Class 5 integrator inside each critical pack and a biological indicator PCD at the designated cold spot.
- Close door securely, select the right cycle, and record cycle parameters in the load log after completion.
Autoclave loading is a precision task with zero margin for guesswork. When staff understand not just the “how” but the “why” behind each rule, they’re less likely to cut corners on hectic days. A facility that pairs consistent loading practices with a validated sterilizer—whether a gravity-tabletop unit or a high-throughput pre-vacuum system—will see fewer re-sterilizations, shorter drying times, and a sterilization log that passes every audit.


